
 By
Rajesh Pandey
&
Steven Winkelman
Published Feb 3, 2026, 9:30 AM EST
Sign in to your Android Police account
Add Us On
Summary
Generate a summary of this story
follow
Follow
followed
Followed
Like
Like
Thread
Log in
Here is a fact-based summary of the story contents:
Try something different:
Show me the facts
Explain it like I’m 5
Give me a lighthearted recap
By
Rajesh Pandey
&
Steven Winkelman
Published Feb 3, 2026, 9:30 AM EST
Sign in to your Android Police account
Add Us On
Summary
Generate a summary of this story
follow
Follow
followed
Followed
Like
Like
Thread
Log in
Here is a fact-based summary of the story contents:
Try something different:
Show me the facts
Explain it like I’m 5
Give me a lighthearted recap
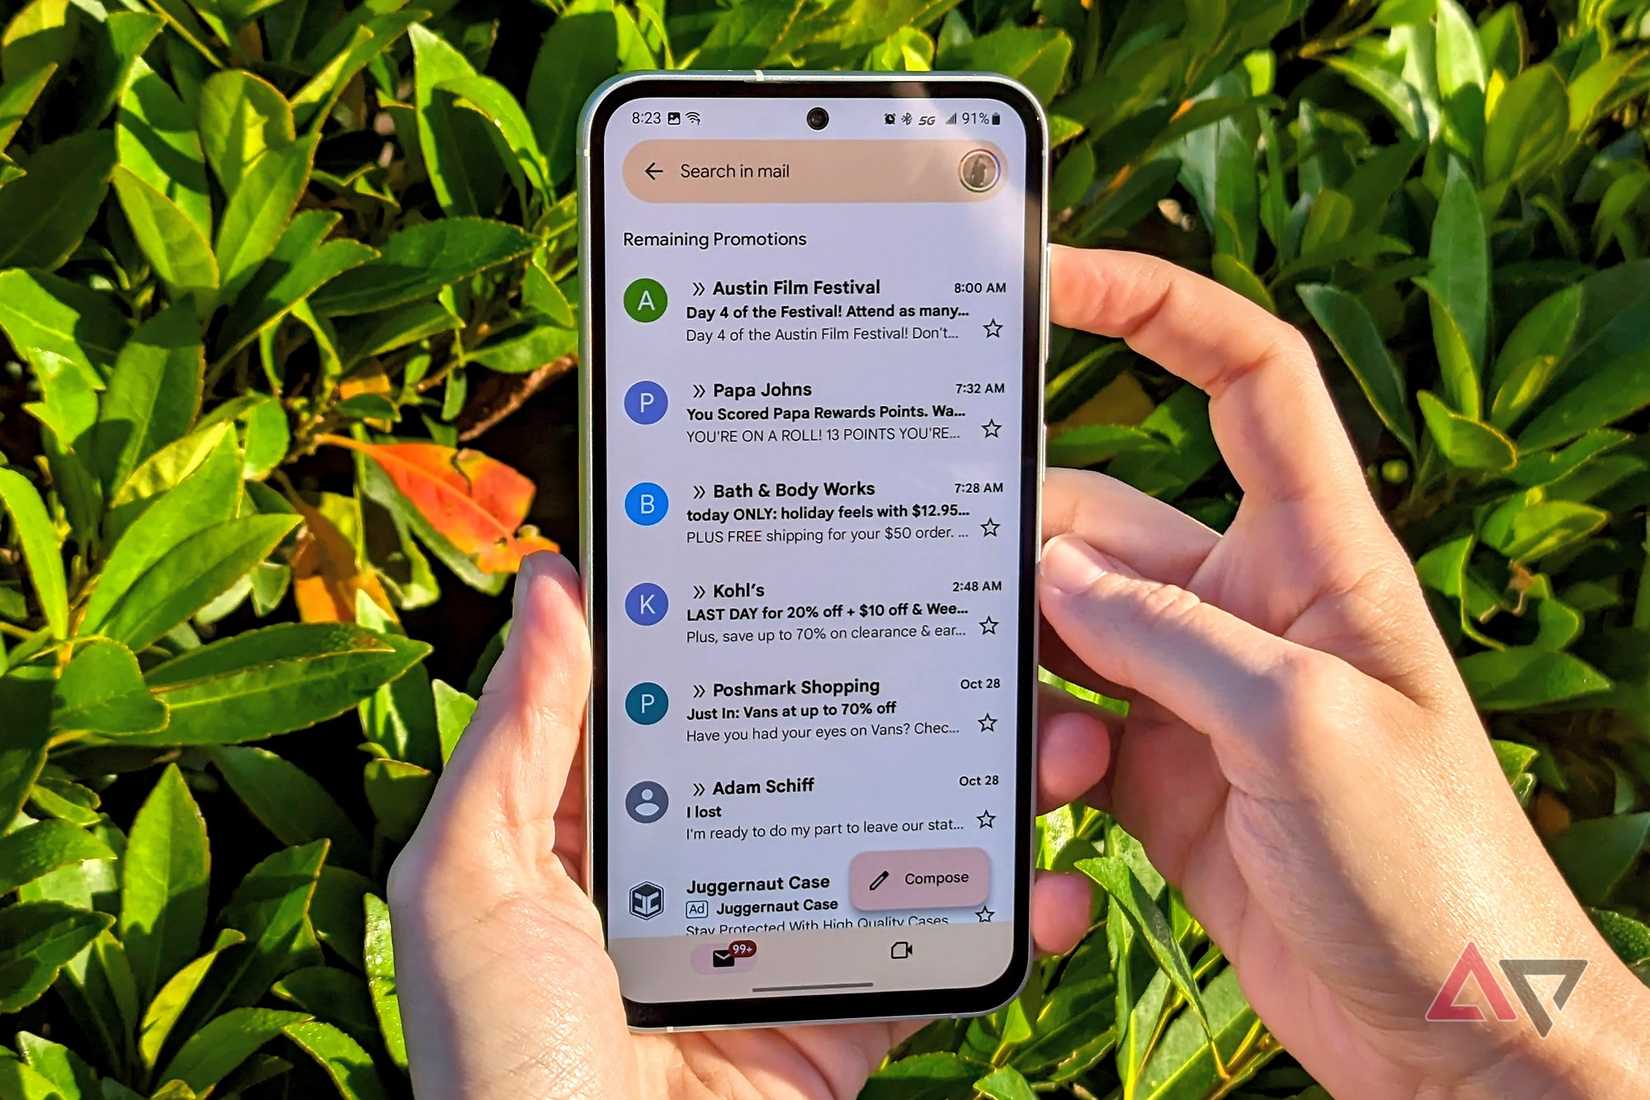
If you are always on the go, Gmail is probably among the most used apps on your phone.
It makes managing your inbox easy and keeps you informed of all high-priority emails that arrive.
But the default settings can be more of a distraction than a help.
From the annoying Meet tab taking up valuable screen real estate to notification settings that only show "important" emails while letting the rest slip through the cracks, there is plenty of room for improvement.
By tweaking a few hidden settings, you can transform Gmail from a cluttered inbox into a streamlined tool that works for you.
My inbox stopped feeling like a problem I had to solve separately
Posts By Anu JoyTurn off the unhelpful Meet tab
No more Meet-ings
If you don't use Meet for scheduling calls, you will find its dedicated tab in the Gmail app annoying.
As someone who rarely uses Meet, I don't need its tab to occupy precious real estate in my email app.
You can easily get rid of the Meet tab from the Gmail app.
Even better, you can disable the Meet tab on a per-account basis. So, you can hide it from your personal inbox while keeping it for your work mail account for quick access to your scheduled calls.
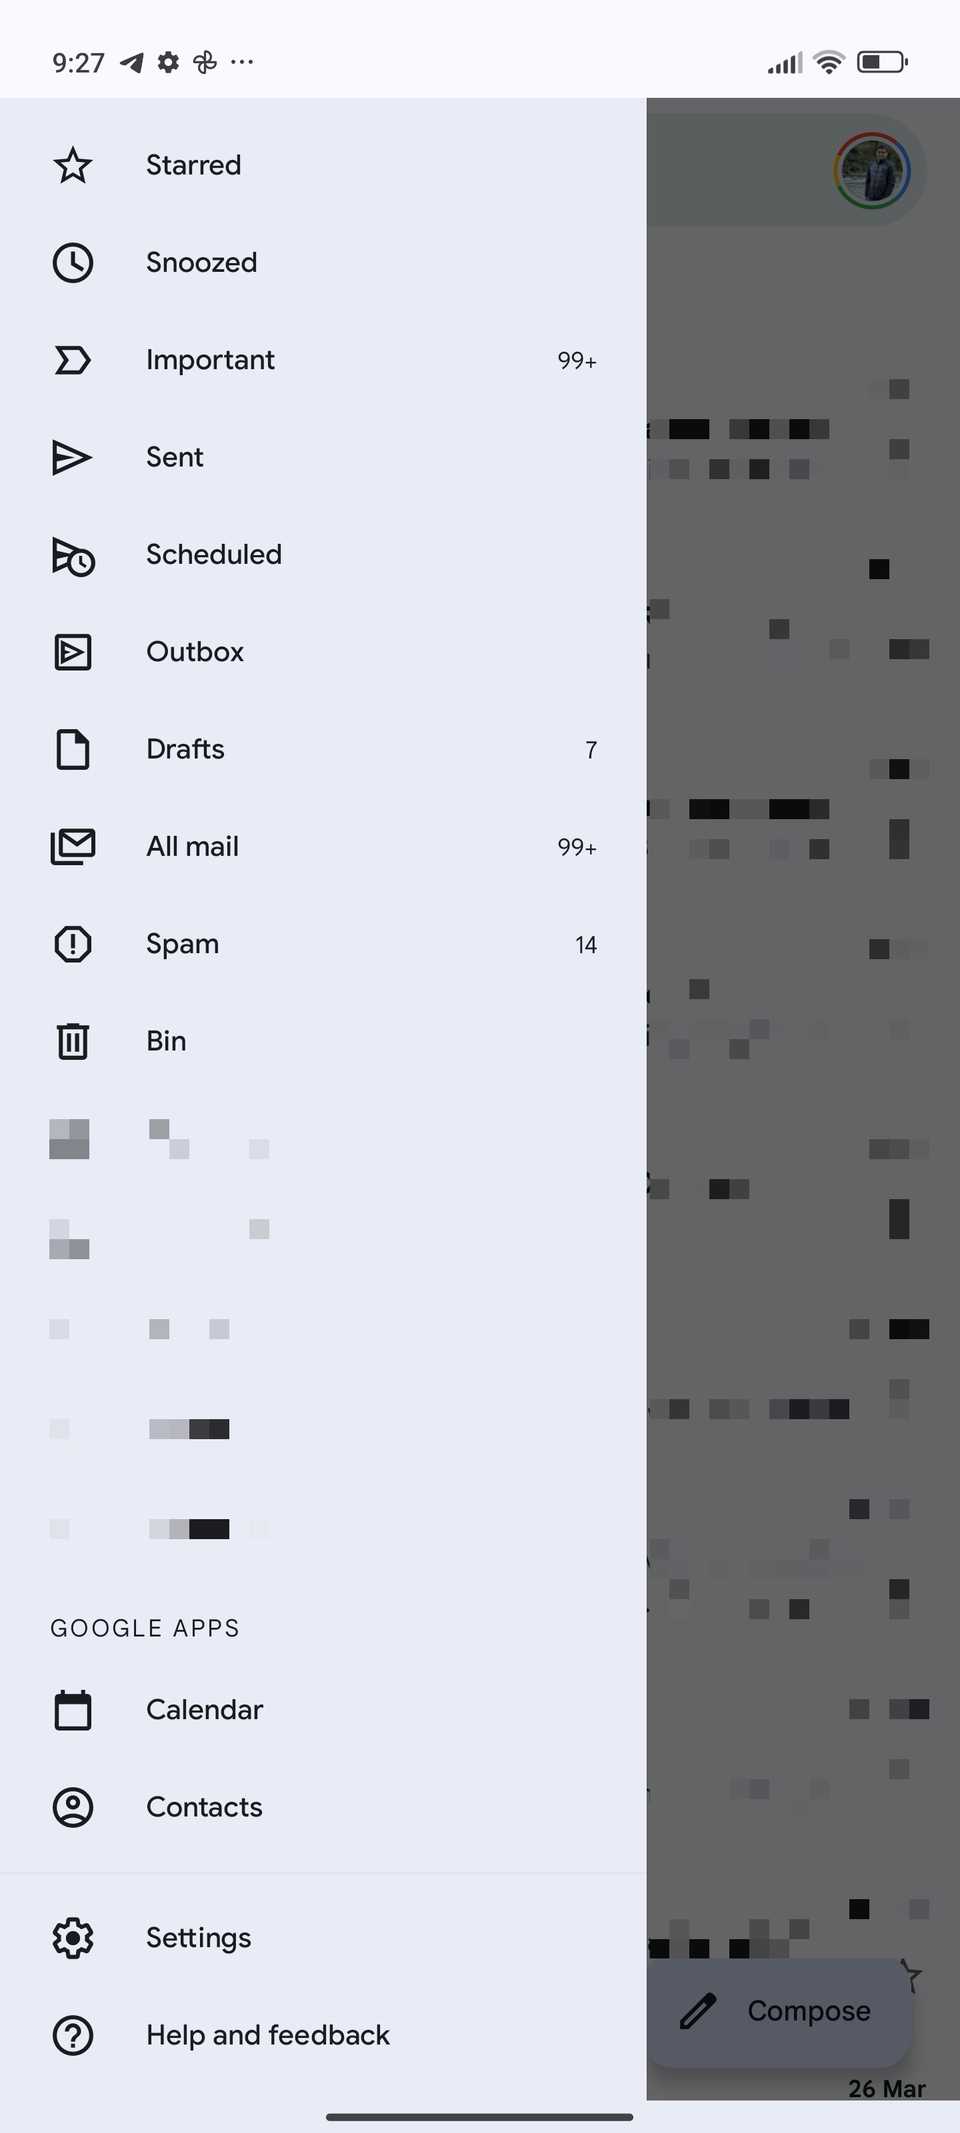
- Open the Gmail app on your phone. Tap the three-line (≡) icon inside the search bar in the upper-left corner to bring up the hamburger menu.
- Tap Settings located at the bottom of the menu.
-
Select your Gmail account from the list.
 Close
Close
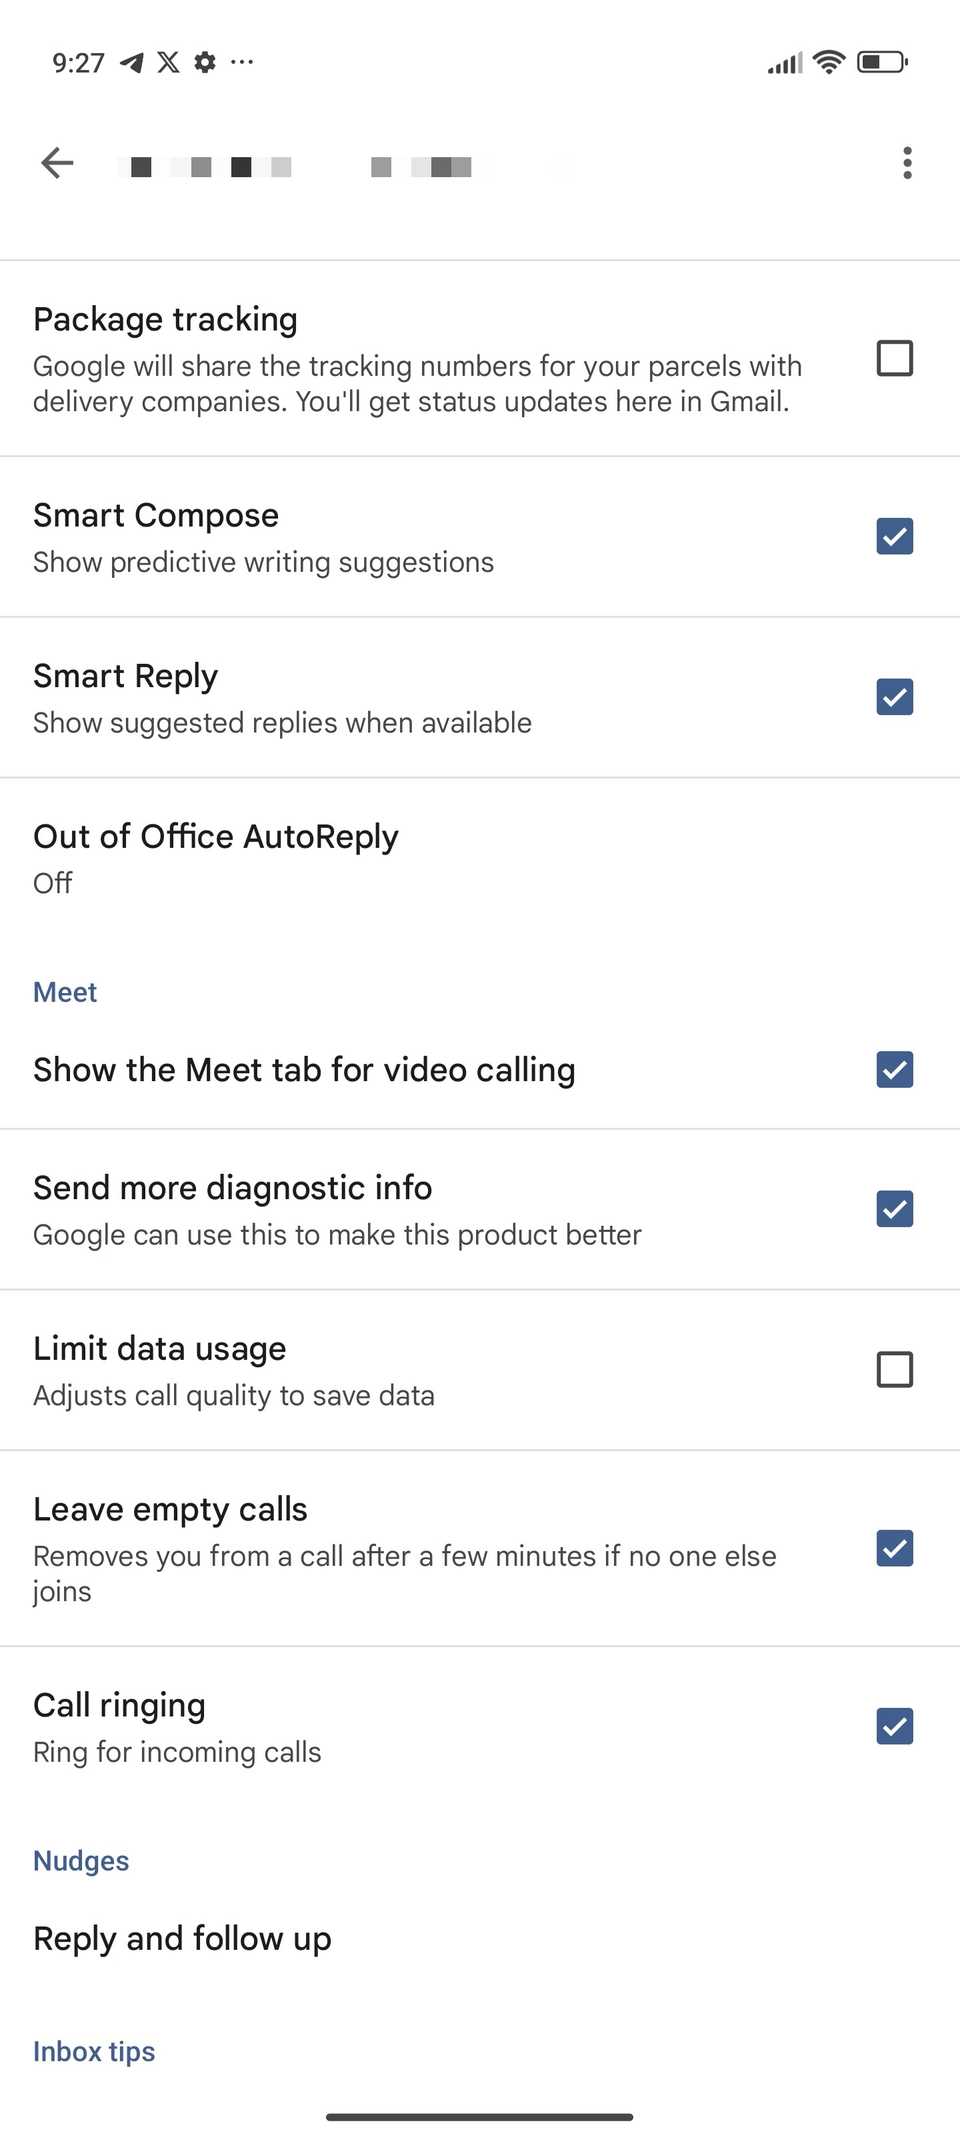
- Scroll down to the Meet section from the settings page that opens.
-
Turn off the Show the Meet tab for video calling option.
 Close
Close
The Gmail app will automatically restart with the Meet tab hidden.
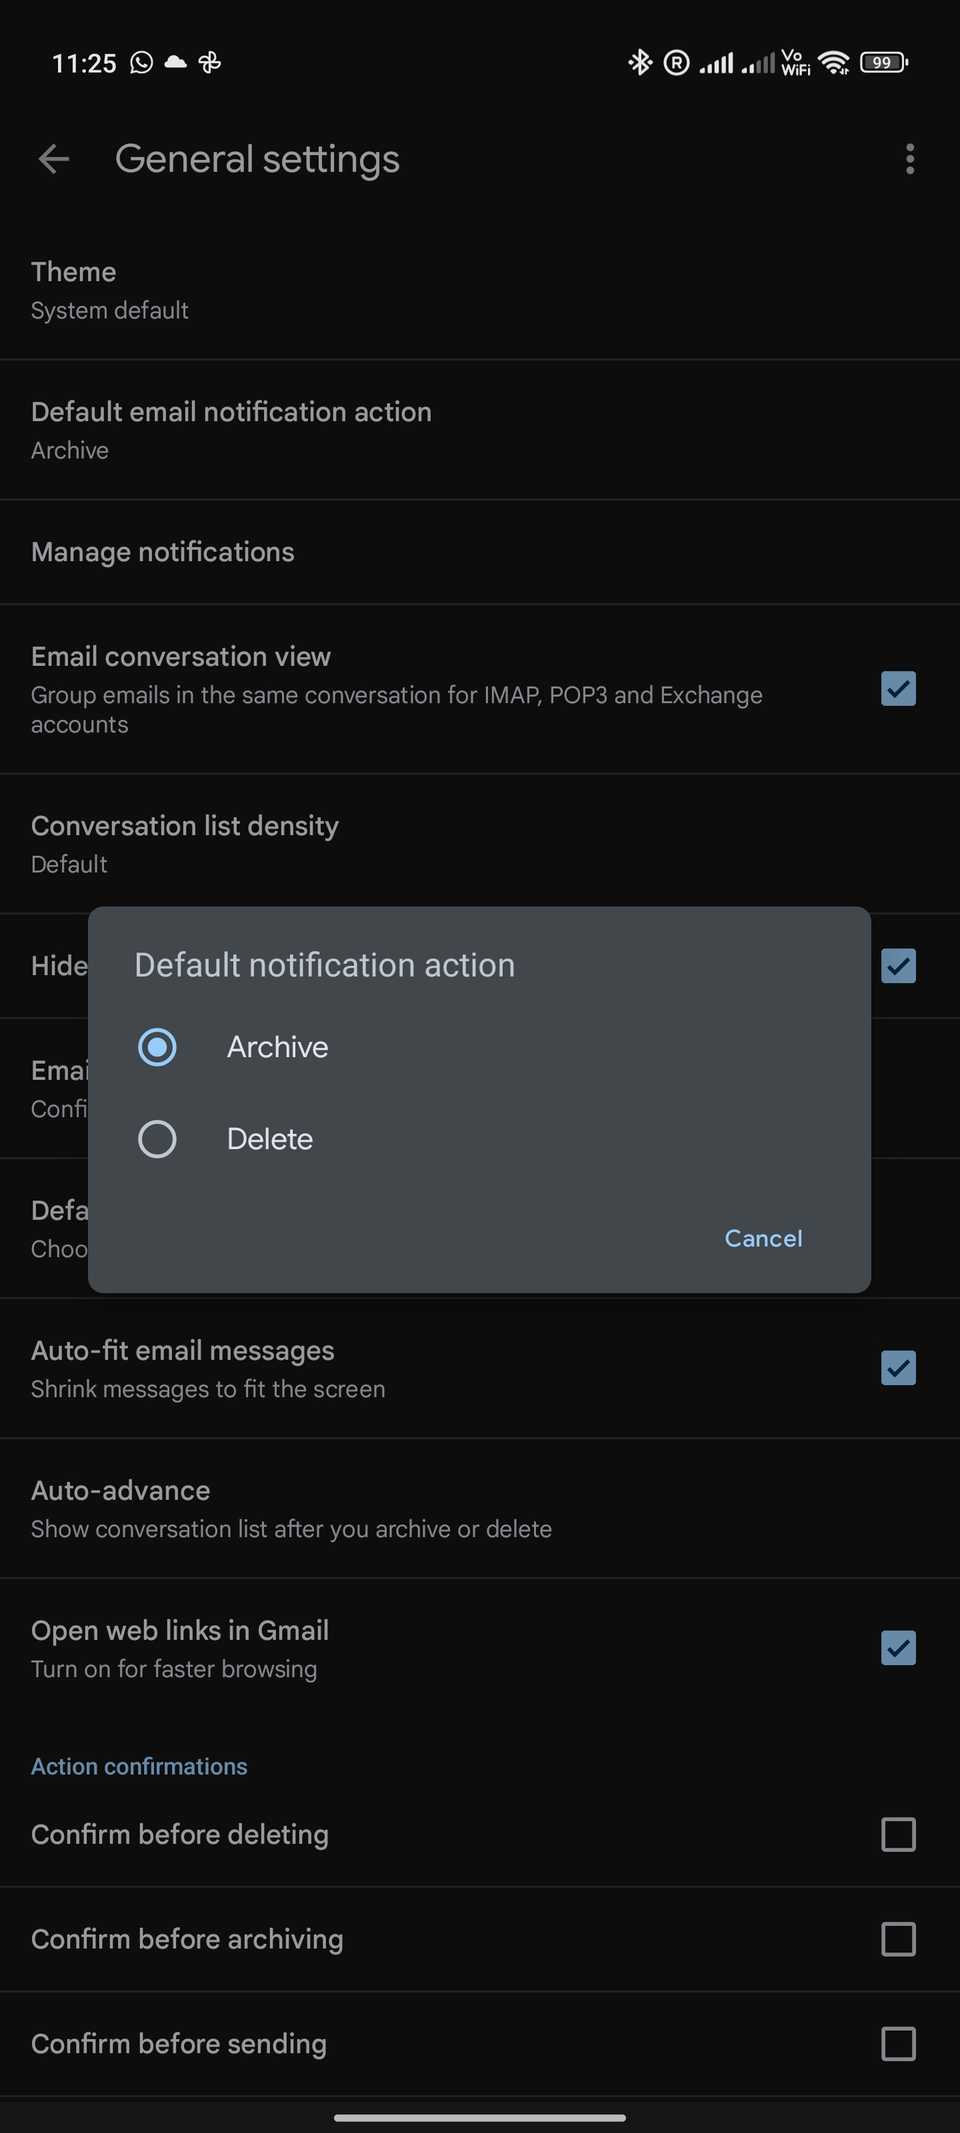
Change the default notification action button
Delete instead of archive
The beauty of Android's notification system is that you can directly take action on notifications.
By default, Gmail notifications allow you to directly archive, reply, or mark messages as read.
If you're the type who likes to trash unwanted emails immediately, it's a good idea to swap out the archive button for delete. Here's how:
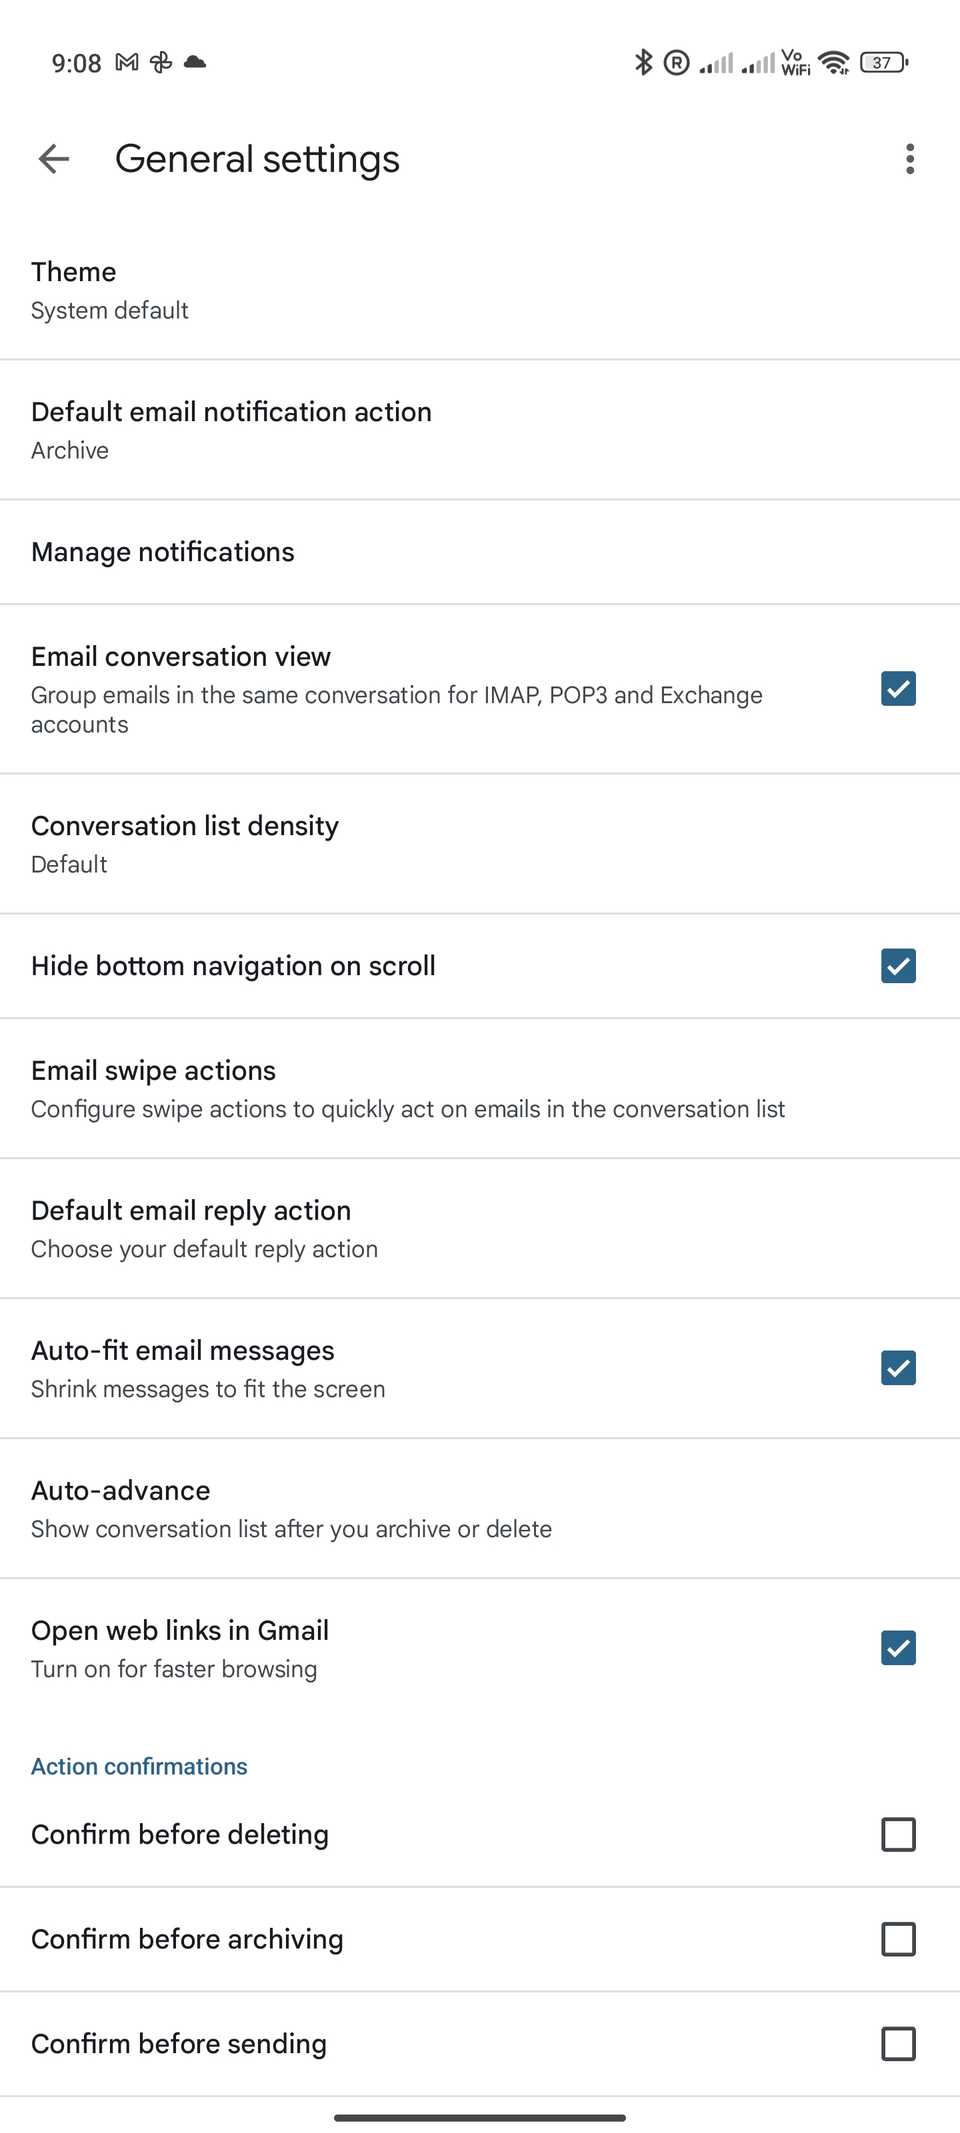
- In the Gmail app, bring up the hamburger menu (≡) on the upper-left corner.
- Select Settings, followed by General settings.
-
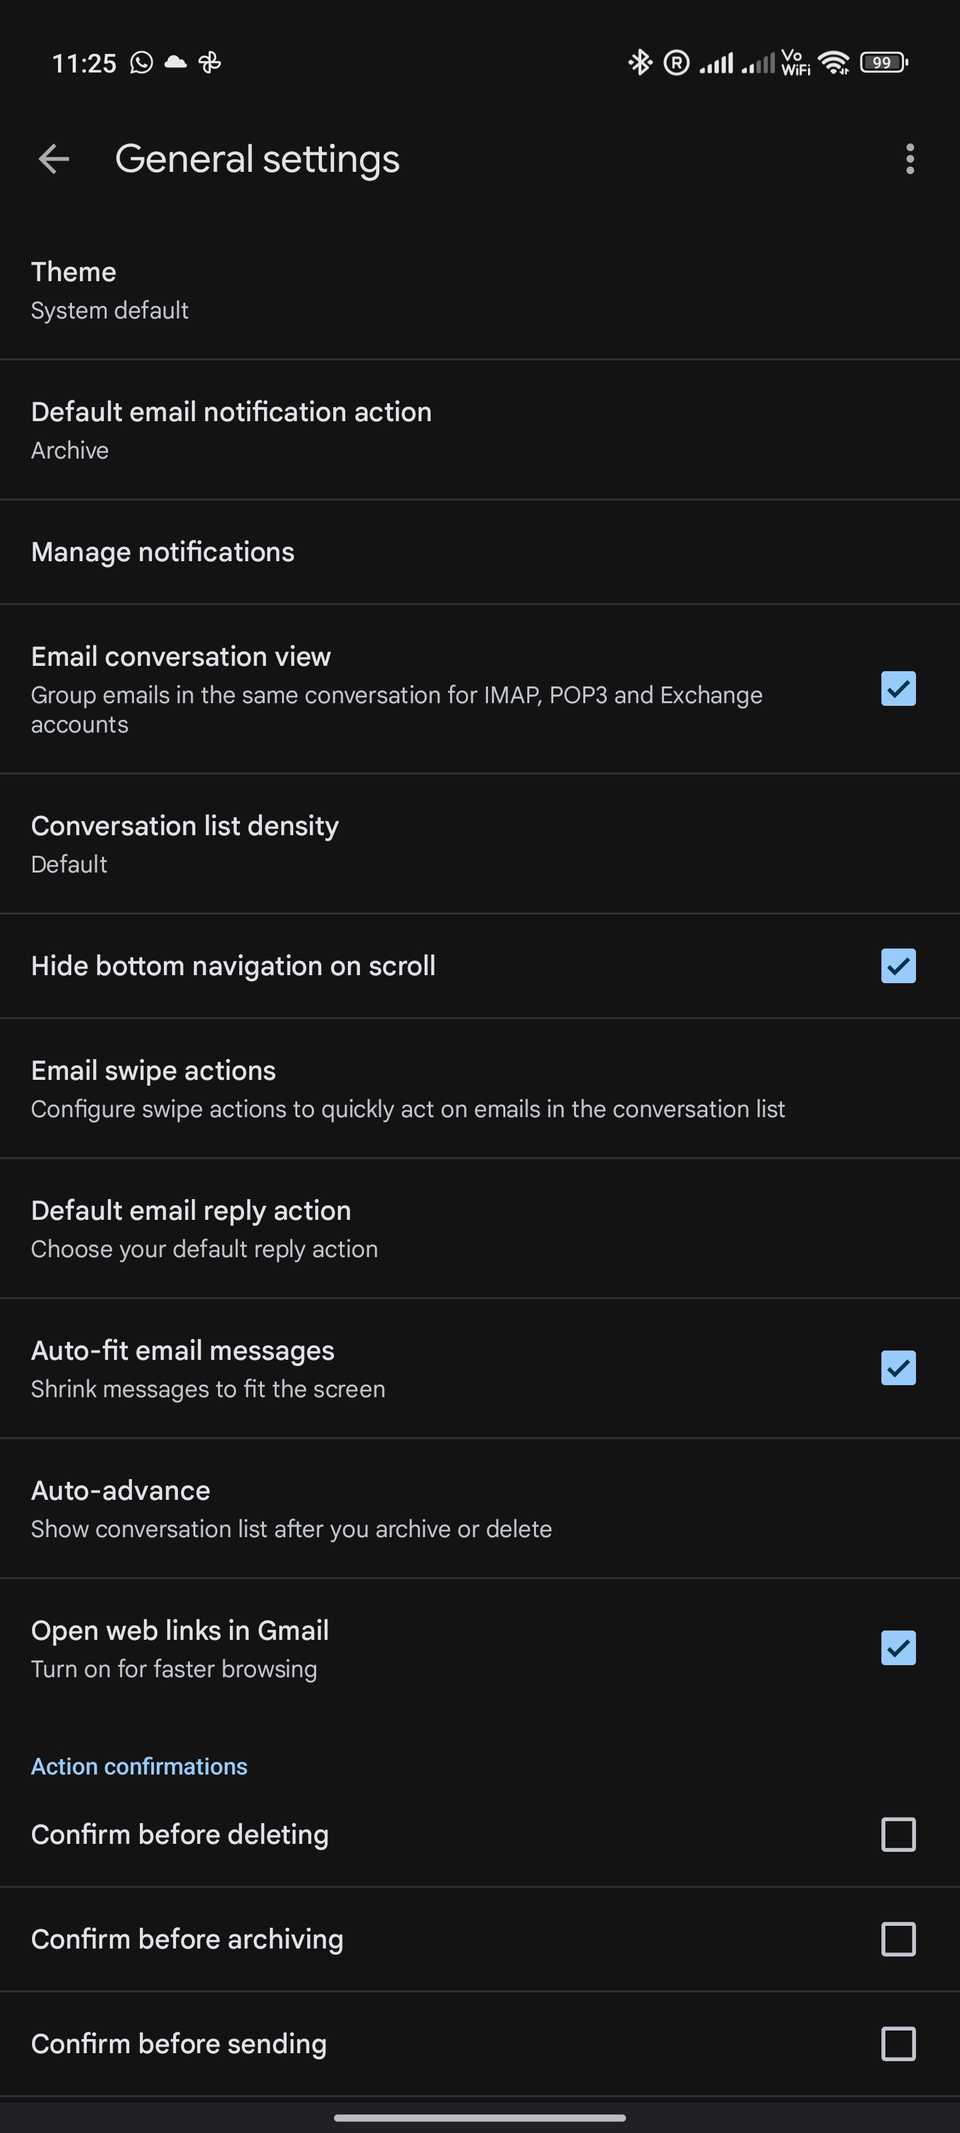
Tap Default notification action and change the option to Delete.
 Close
Close
Instead of Archive, you will get an action button to delete emails from your phone's notification shade.
However, you can't set any other action for the notification action button. The Delete button is also non-customizable.
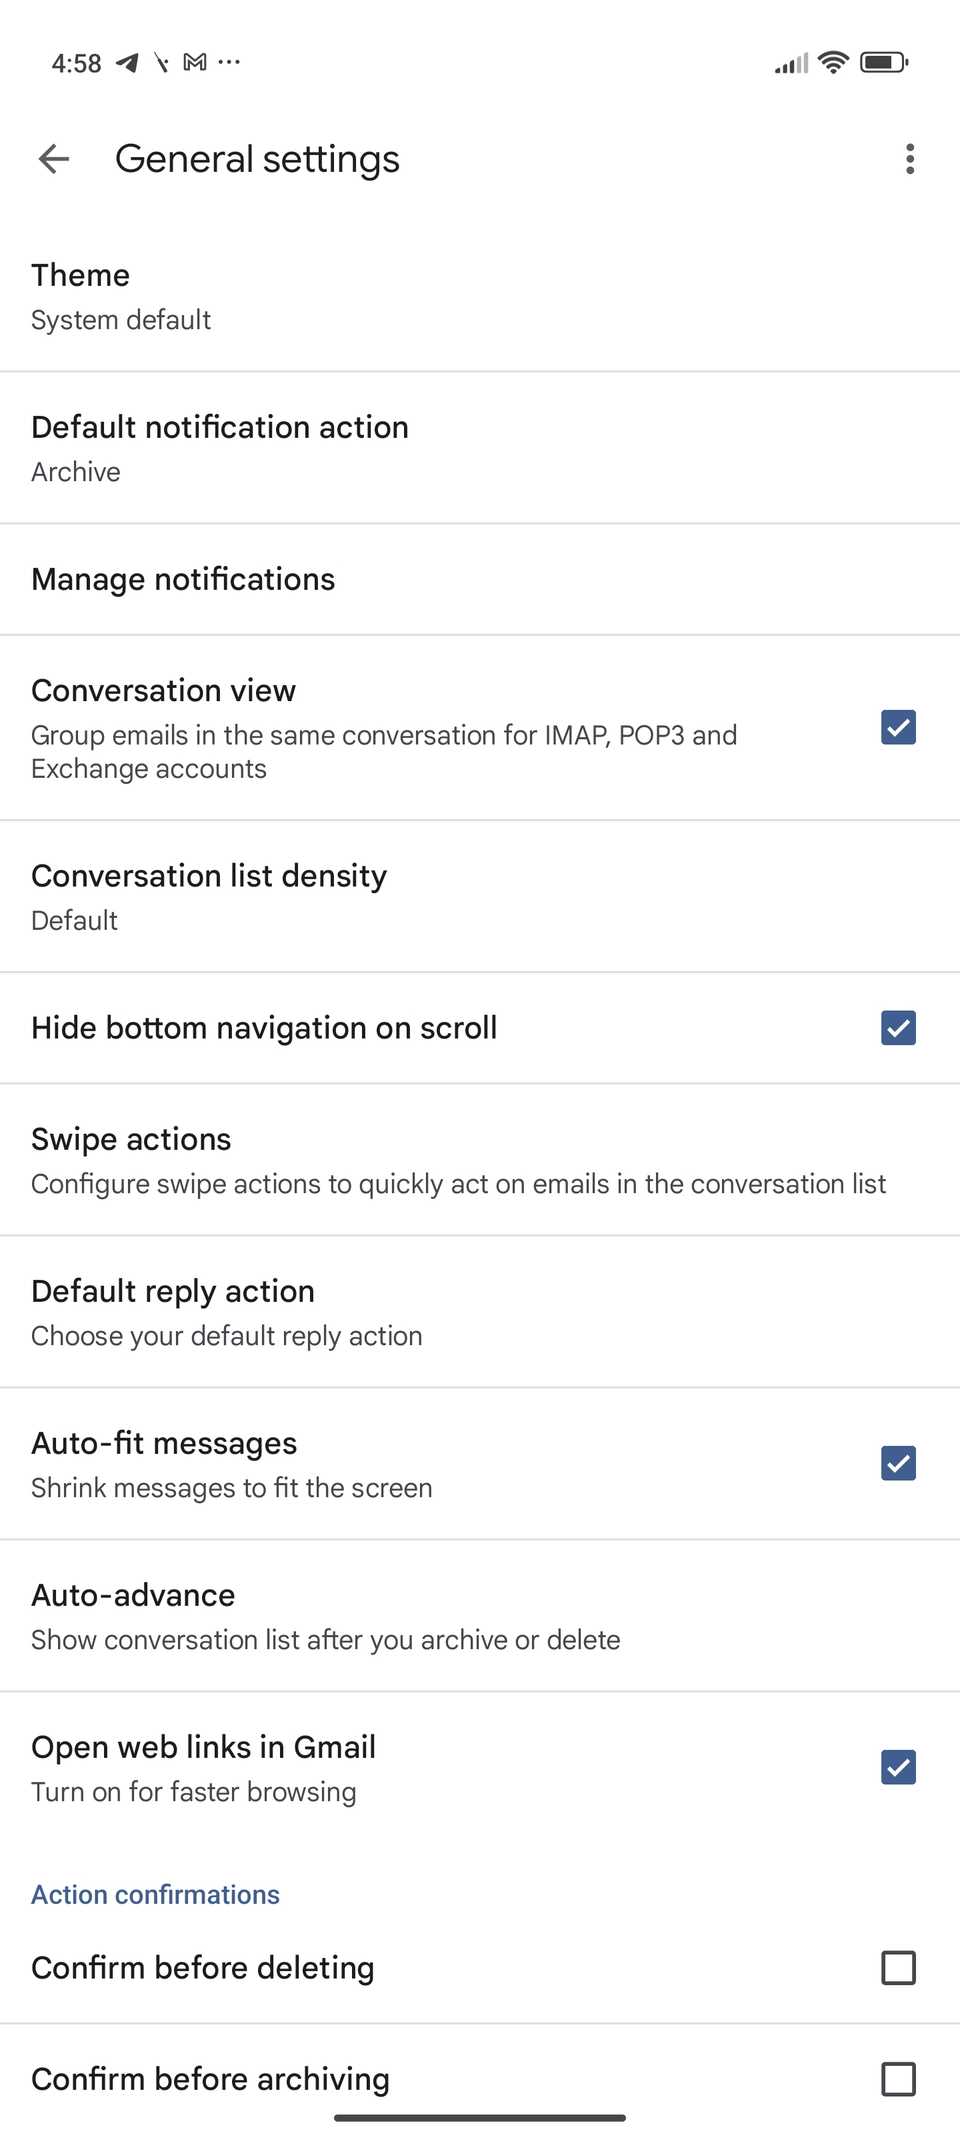
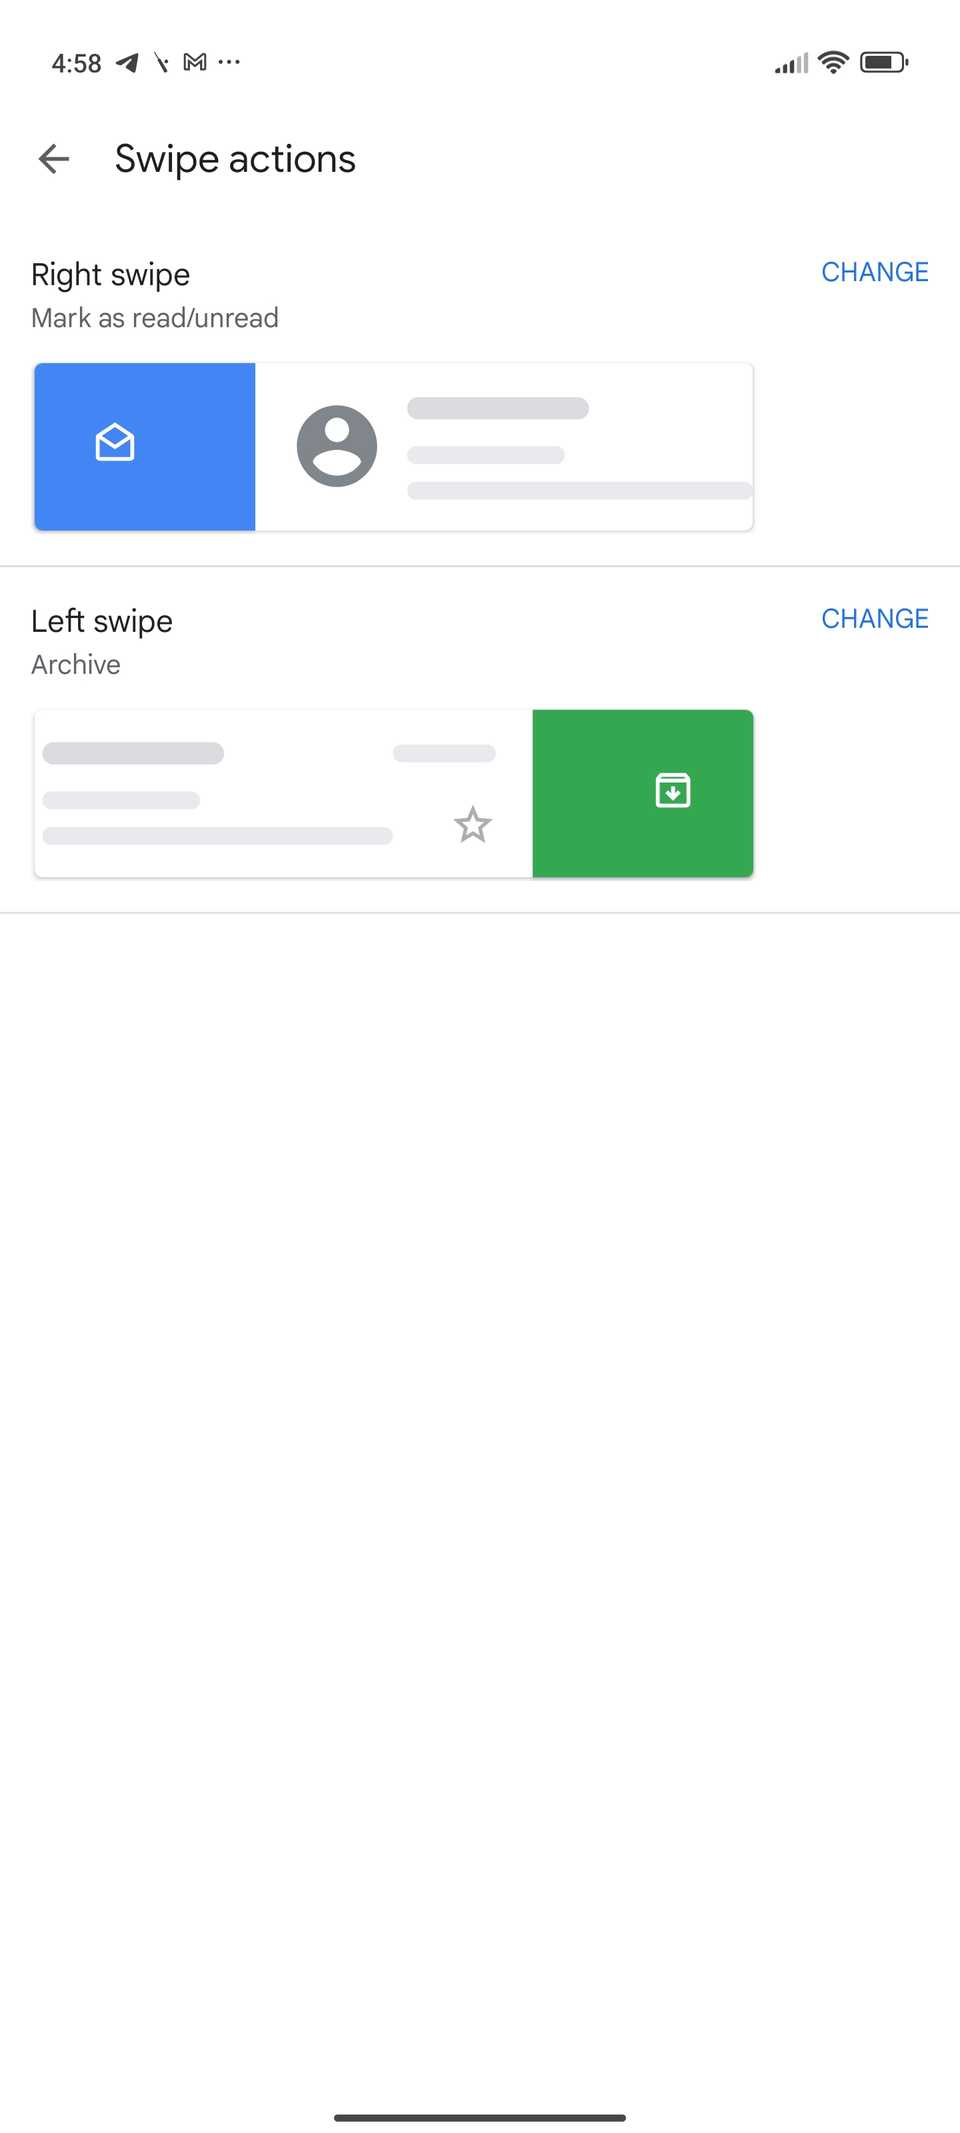
Tweak swipe actions to your liking
Quickly mark as read or delete

You can swipe left or right on emails in your inbox from the Gmail app to delete or archive them.
This is an excellent feature as it lets you quickly take different actions on various emails in your inbox.
Even better, you can customize the swipe actions to your liking and requirements to speed up your workflow.
- Open the hamburger menu in the Gmail app by tapping the three-line (≡) icon in the upper-left corner.
- Navigate to Settings > General settings.
-
Select Swipe actions.
 Close
Close
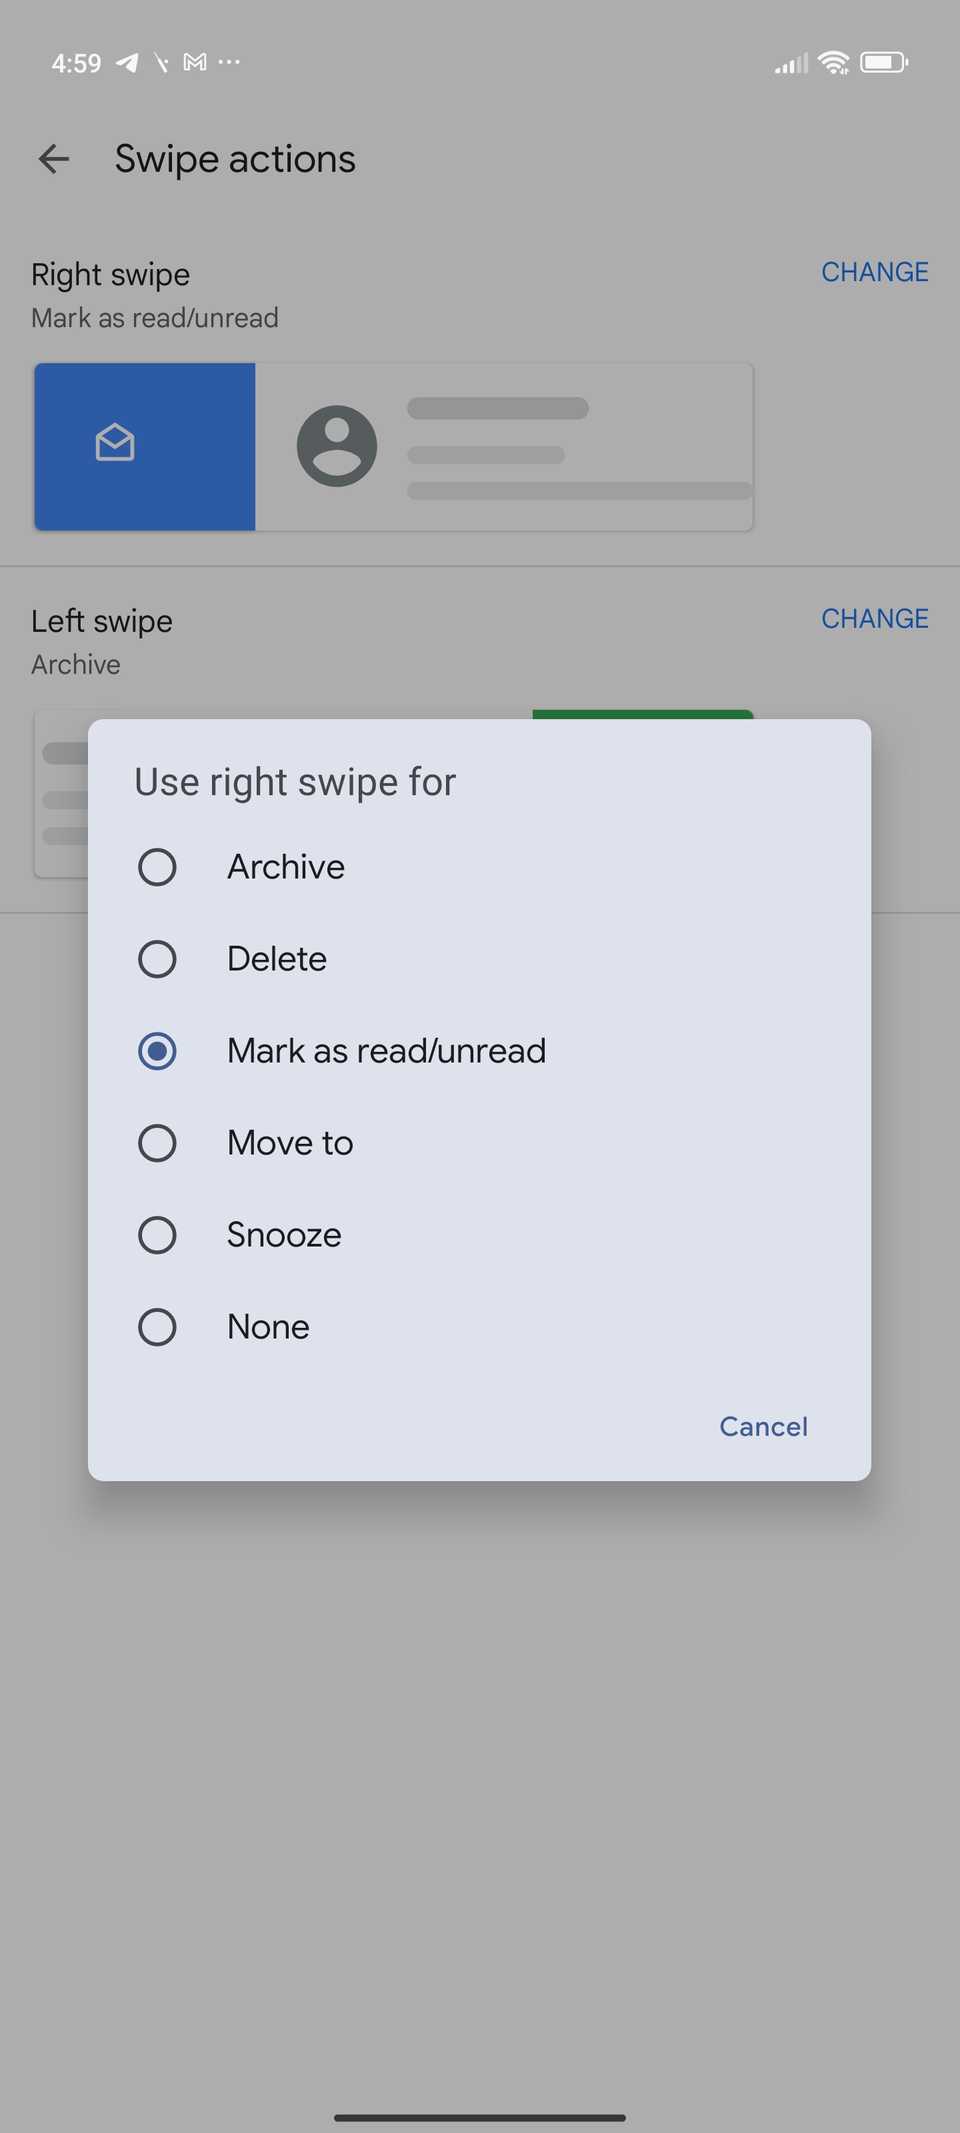
-
From here, you can configure the right and left swipes individually. You can set the swipe action to archive, delete, mark as read/unread, move to, or snooze an email based on your preference.
 Close
Close
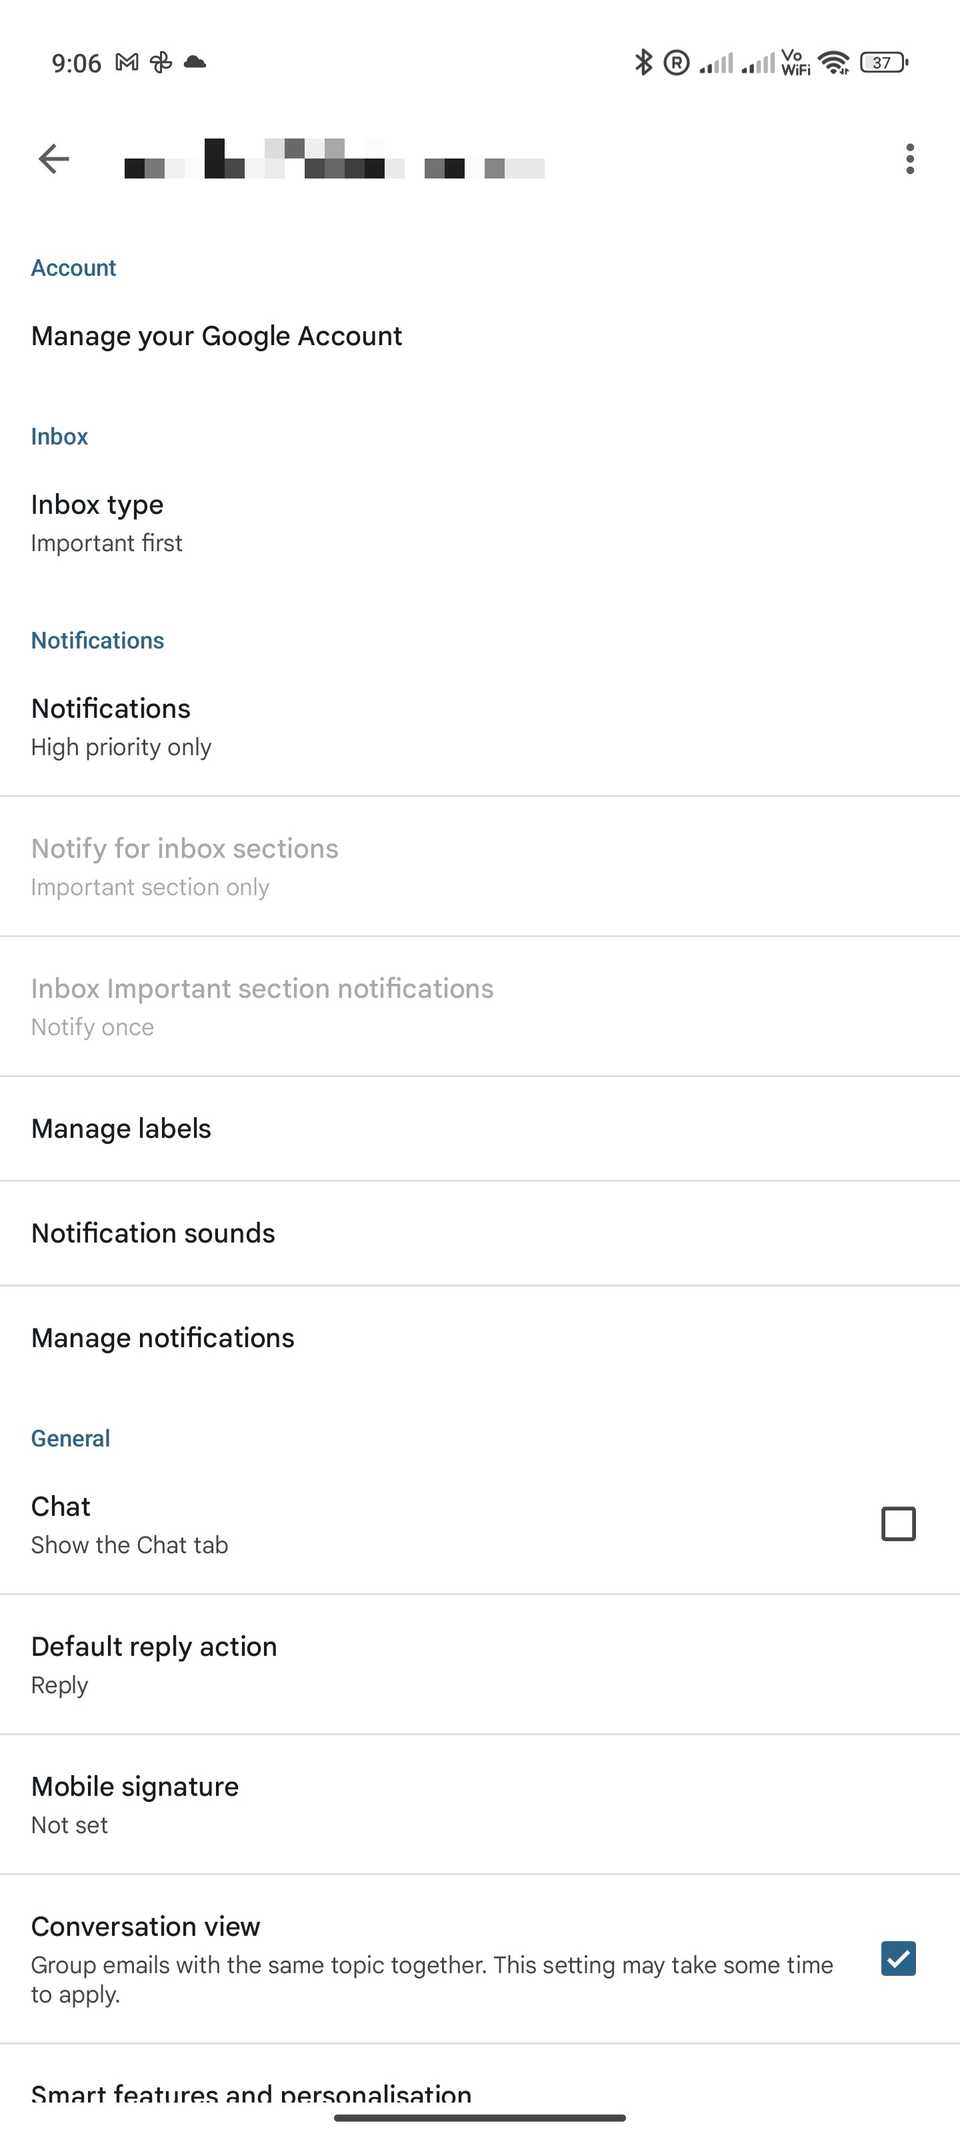
Get notifications for every email
Because all emails are important
By default, the Gmail app for Android only notifies you of high-priority emails. This ensures you are not bothered by notifications from unwanted emails.
But in some scenarios, you might want to be notified of all emails that hit your inbox, even when you are on mobile.
To do this, you must dive into the Gmail app settings and change its notification settings.
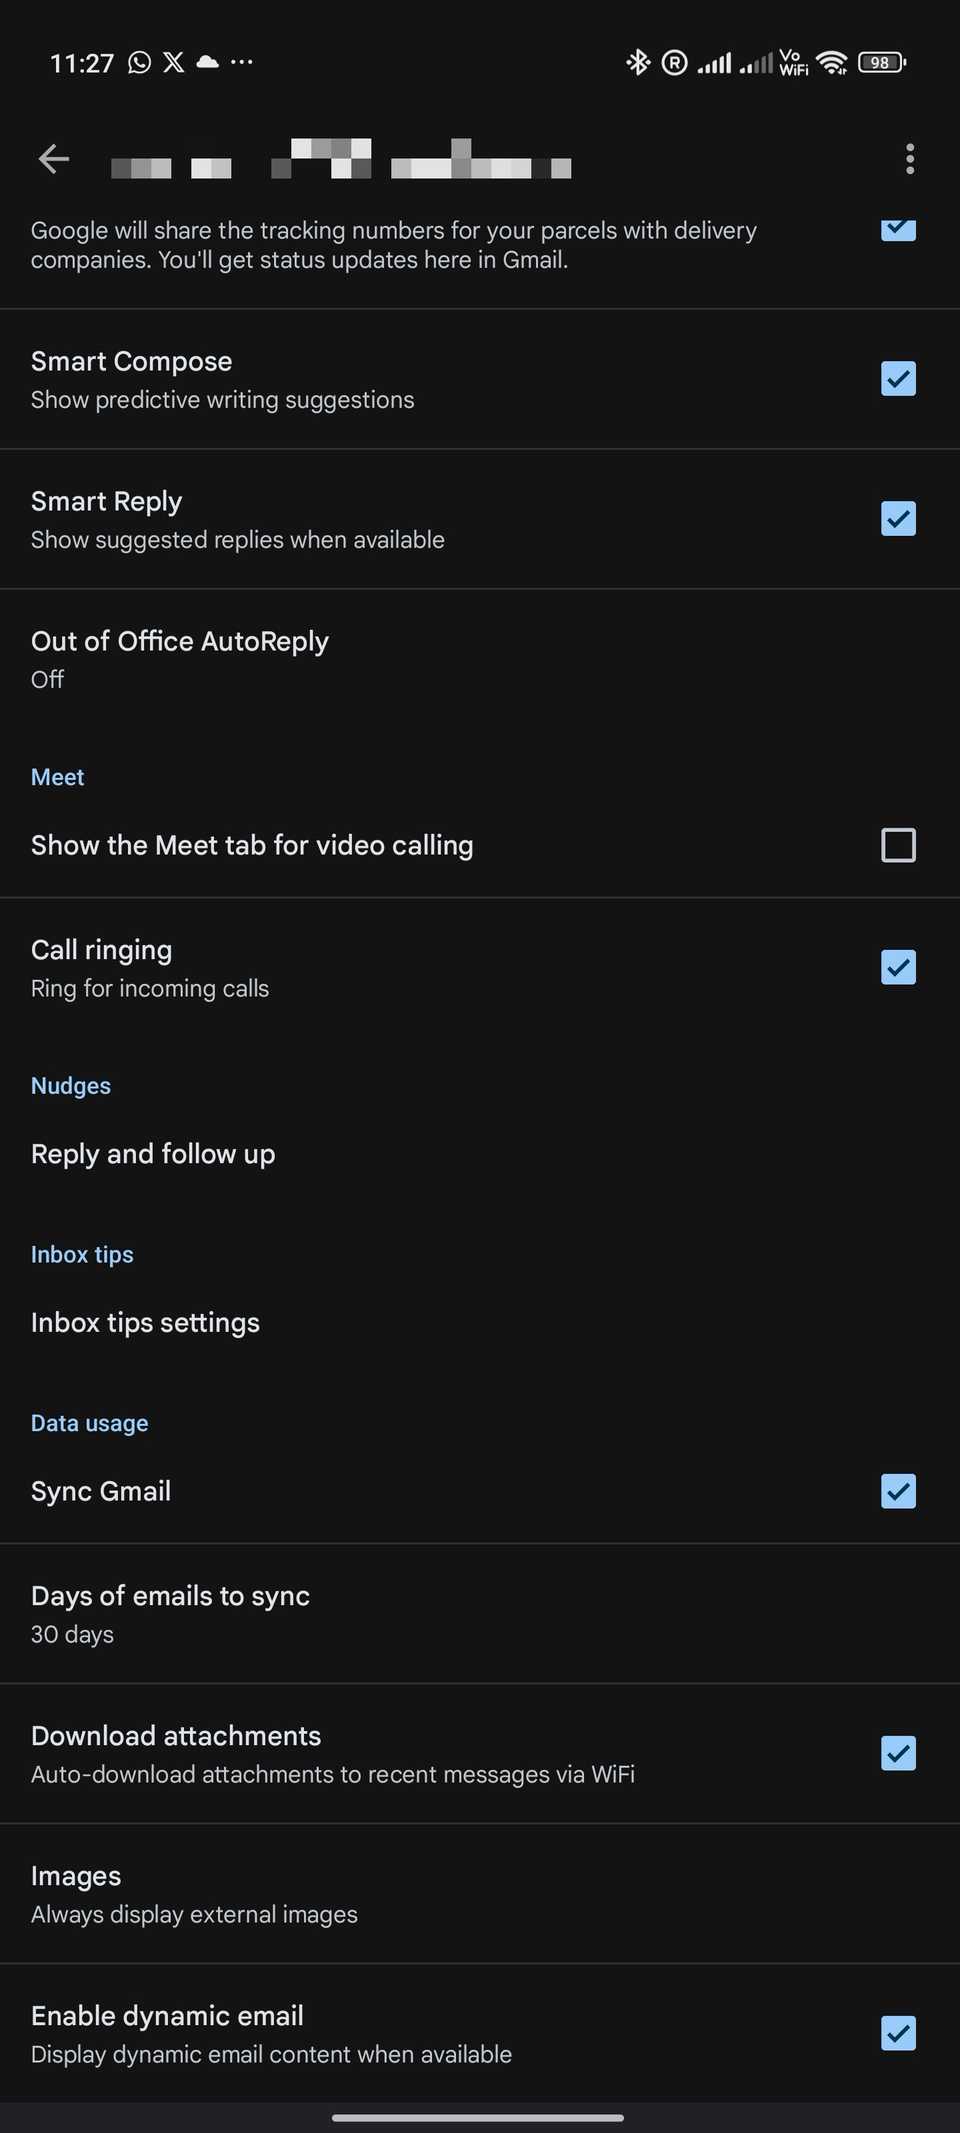
- Open the Gmail app and navigate to Settings from the hamburger menu on the left.
- Select the Gmail account whose notification settings you want to change.
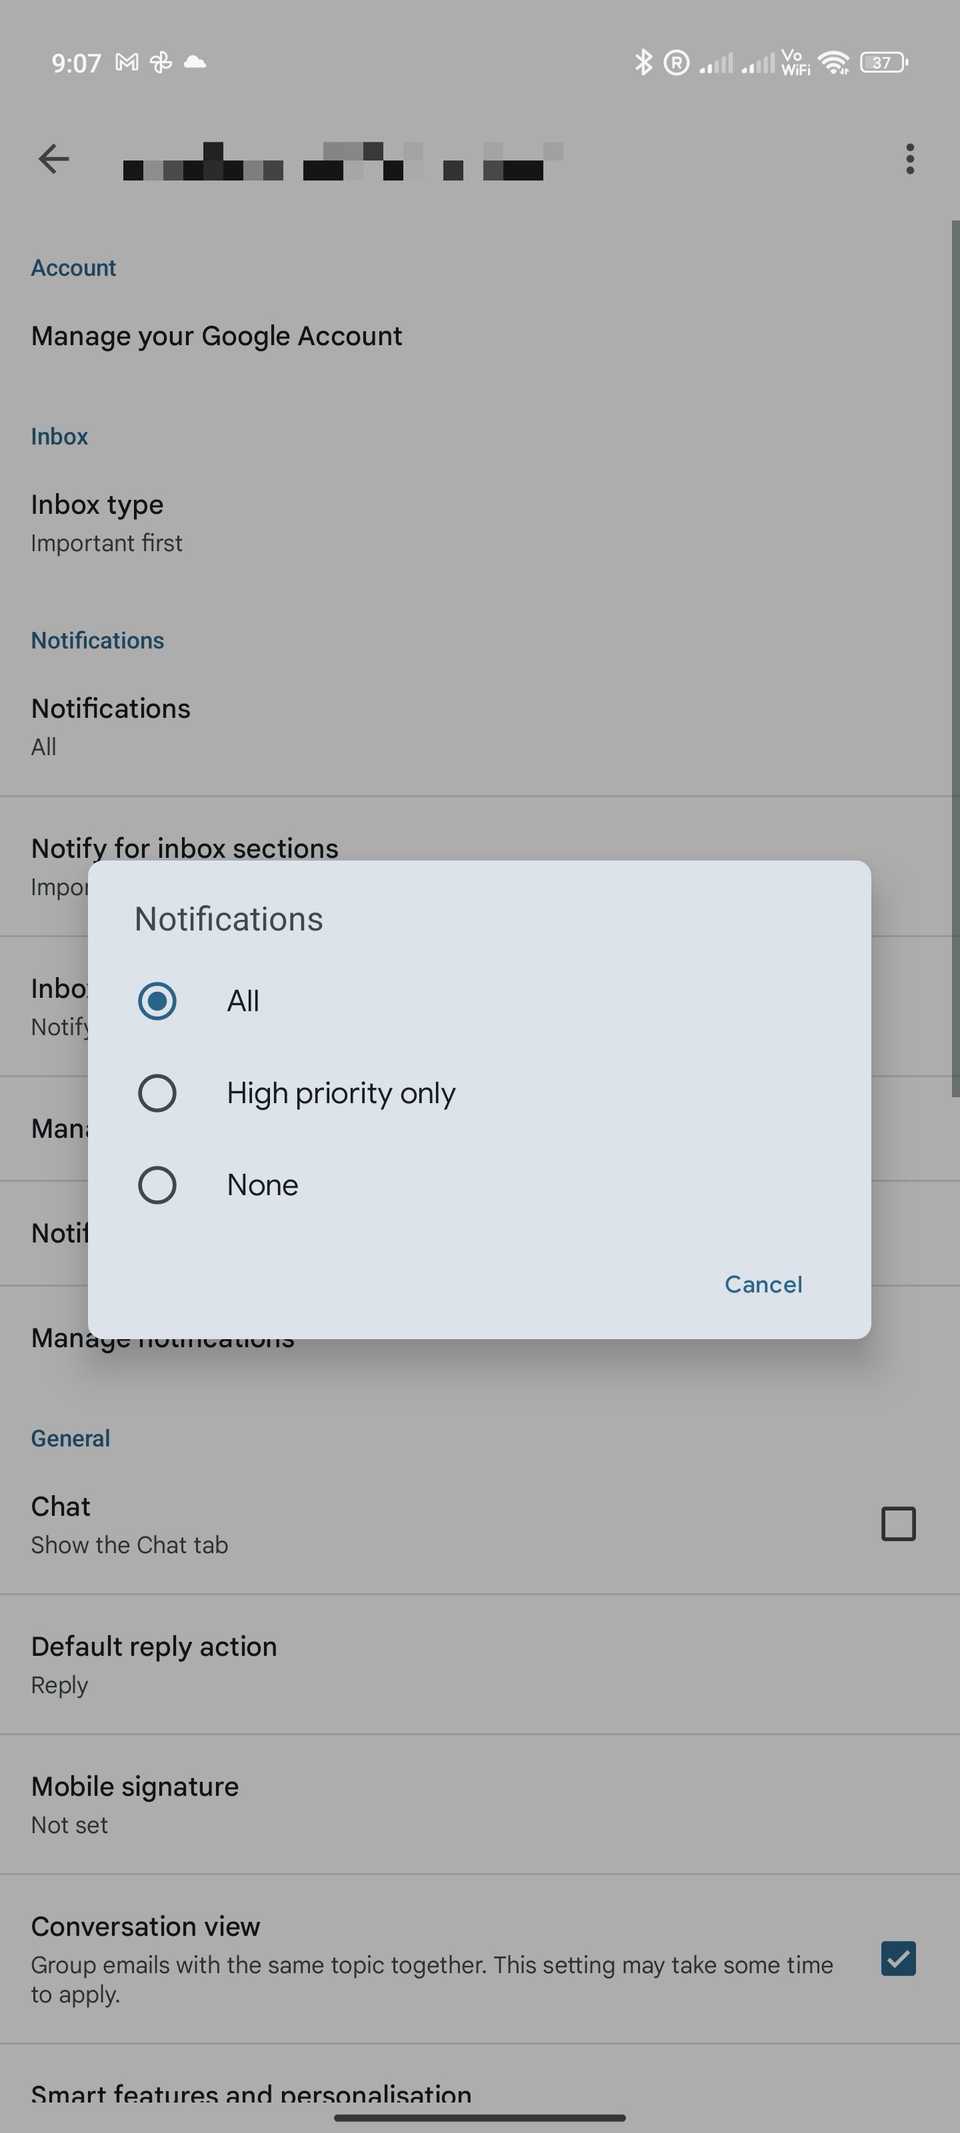
- From the Notifications section, tap Notifications and select All. If you don't want notifications for any email that hits your inbox, tap None.
-
Tap Notify for inbox and select whether you want to be notified for all new emails or only the important ones.
 Close
Close
The Gmail app lets you set notification preferences on a per-account basis.
Thus, you can ensure you are notified of emails that land in your work account while only getting notifications for important emails in your personal inbox.
Enable action confirmation
There have been instances where I accidentally tapped the send button in Gmail's Android app while replying to an email.
Although Gmail has a brief "Undo" button that appears after sending or deleting an email, it disappears quickly.
Subscribe to the newsletter to unlock Gmail's hidden power
Get more practical Gmail how-tos by subscribing to the newsletter — deep dives into hidden settings, step-by-step tweaks, and hands-on setup advice that help you tame inbox clutter and master Android Gmail features. Subscribe By subscribing, you agree to receive newsletter and marketing emails, and accept our Terms of Use and Privacy Policy. You can unsubscribe anytime.If you'd like an extra layer of protection, you can enable Gmail's action confirmations. This forces a pop-up to appear, asking you to confirm before an email is officially sent.
Here's how to turn on the feature:
- Open the Gmail app on your Android phone.
- Bring up the hamburger menu (≡) by tapping the overflow menu button from the upper-left corner.
- Navigate to Settings > General settings.
-
Scroll down to Action confirmations. Check the boxes for Confirm before deleting, Confirm before archiving, and Confirm before sending based on your needs.
 Close
Close
You can also extend the length of time the Undo button appears in Gmail, but you have to make the changes from a desktop browser.
To extend, go to mail.google.com, select Settings > see all settings > General > Undo Send, choose the delay time from the Send cancellation period dropdown, then select Save Changes.
Change Gmail's sync settings
By default, the Gmail app for Android syncs and stores emails for the last 30 days. This is good enough for most users.
But if you frequently find yourself without internet access and unable to access important emails from over a month ago, you can change Gmail's sync settings to avoid this from happening.
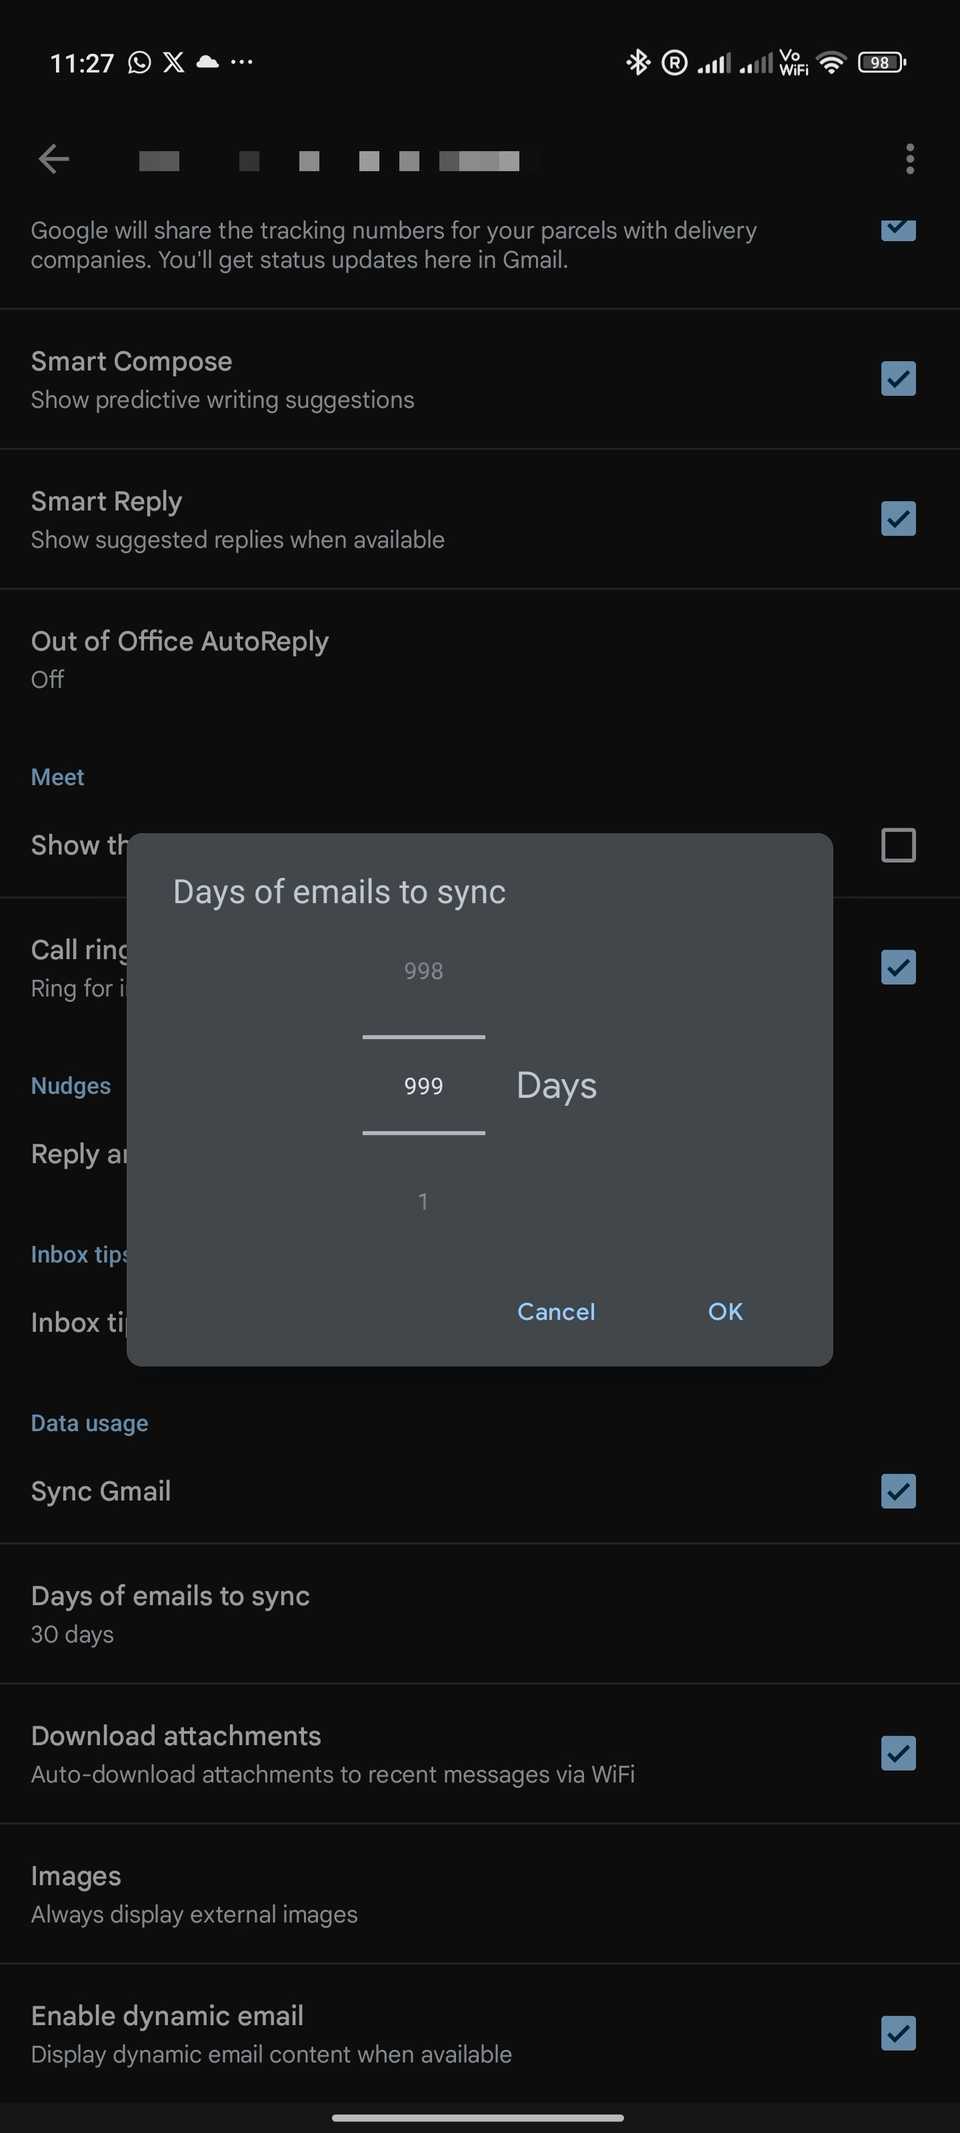
- Open the Settings menu in Gmail's Android app from the sidebar.
- Select the Gmail account whose sync setting you want to change.
- Scroll down to Data usage.
-
Tap Days of emails to sync and select the days of emails to sync. You can sync emails up to 999 days old.
 Close
Close
Based on your settings and preferences, the Gmail app will download the emails locally onto your phone for quick access even without the internet.
Stay on top of your inbox
Changing the above settings in Gmail's Android app will make it easy for you to tame the chaos in your inbox.
Besides the above settings, Gmail for Android packs several useful features, including the ability to deal with repeat emails.
You should also learn how to reduce spam emails to keep unwanted clutter away from your Gmail account.
-
 Gmail
Gmail
 This Gboard feature is just around the corner, and it's going to change how you type